To install this product, please do as the following steps:
Download the installation package for M4V Converter Plus from Home Page
Double clicks the installation file M4VConverterPlus.dmg to start installing it on your computer
Follow the instruction to finish the installation
When you see a window where there is an icon of M4V Converter Plus, drag and drop the icon onto the desktop. Then you can just run the program from the desktop icon.
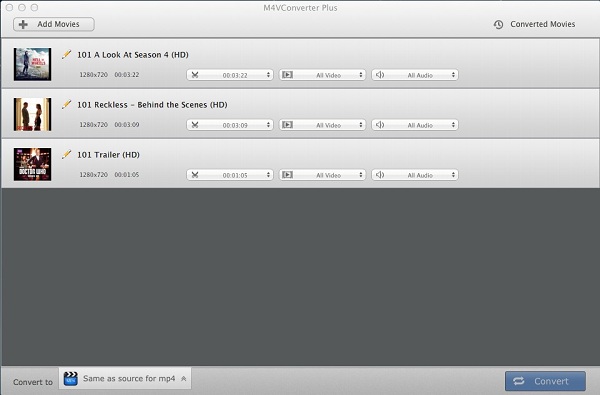
The steps of adding files:
Step1: Click the Add Movies button or Add Files icon(Or do this through the menu item File->Add files to converting list), then the adding window pops up and all available videos will be listed as follows:
Tips: The program allows you to import files from different iTunes library.
Step2: Locate and select the files you want to import.
Step3: Click the Add button, then you can see all the files you chose are shown in the file list.
Tips: You can also drag the protected *.m4v files to the list directly from your disc or other location.
Select the files you want to delete and click  to remove the file.
Or remove the files through the menu item File->Remove from converting list), then you can see the files you chose are deleted.

Click the time setting box then choose Custom option, input the Begin and End time to convert the clips which you want.
Tips: If the original video has chapters, you can choose the single chapter which you want to convert.
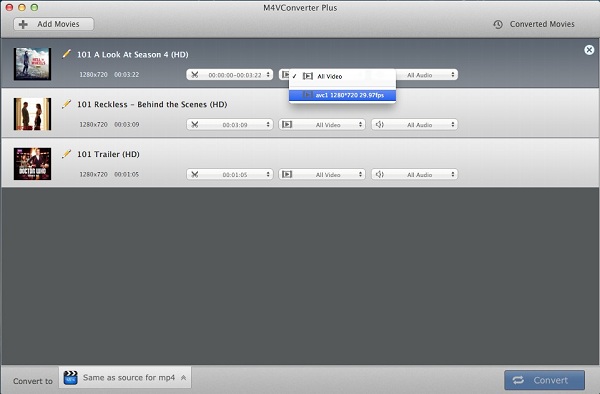
The default Video Setting is All Video, but you can also choose the other two options Disable Video, avc1.
Disable Video: The output file has no video, just audio.
avc1: The video size of the original file, and it is the same as All Video.

The default Audio Setting is All Audio, but you can also choose the other options Disable Audio, mp4a.
All Audio: For multi-language video files, the output file can keep all the audio tracks.
Disable Audio: The output file has no audio, just video.
mp4a: The audio track of the original file, for multi-language video files, it will show all the audio tracks individually.

The profile displays a variety of mobile devices, and each device has one or more popular output formats such as MOV, MP4, FLV, AVI, 3GP and so on, and it shows the profiles which you used recently.
There are also kinds of video and audio formats and video player devices presets for users to choose, whatever you need, you will find one to meet your need.
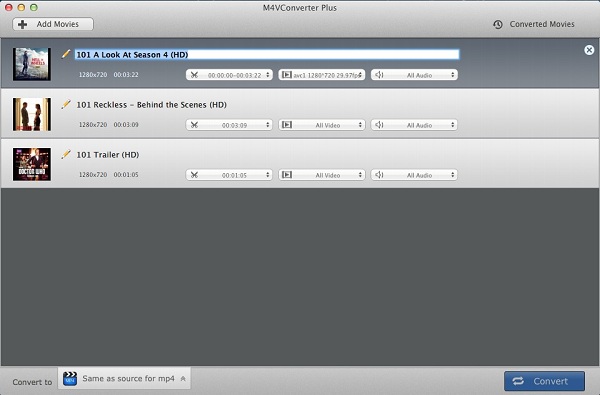
Before you converting, click the pencil icon in the file list, and input the new name of the output file.
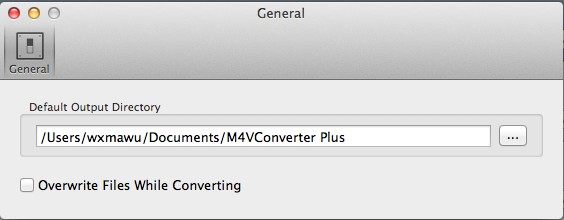
Click the Preferences... through M4VConverter Plus - Menu to reset the output folder according your need.
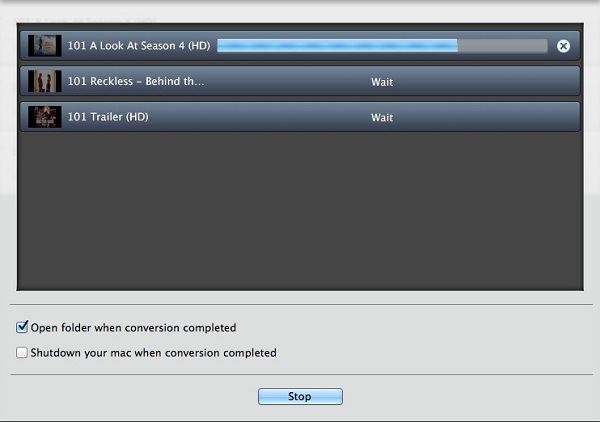
After you open the converting box, the default option is Open folder when conversion completed.
Open folder when conversion completed: If checked, after all the files converted, it will open the output path.
Shutdown your mac when conversion completed: If checked, after all the files converted, your mac will be shut down.

After you add the video files and set the profile,click the button Convert (Or do this through the menu item Controls->Convert) to open the converting box, at the same time, iTunes launched.
Warning: Before the Status show converting progress, iTunes will be shown and hide itself in a flash, and please don't do anything with iTunes during converting, conversion may failed by occurring an error.
Tips: If you want to stop the conversion, just need to click the button Stop, at the same time, iTunes closed.

When the conversion is completed, the history records will be saved automatically and listed according to the profile.
Click the button History to show up the records.
Click the search icon to find the converted files directly.
We want to hear from you. We welcome your comments, suggestions and requests for information. Please use the email addresses below to contact us on any question.
Support: support@m4vconverterplus.com